Moving Day: Colt’s Armory Press


It’s here! We welcomed a 14×22 Colt’s Armory Press into the shop a few weeks ago. Feel lucky, blessed, lots of degreasing and rust removal ahead.
There is so much to say, but really you should just come by and see the wonder that it is for yourself (or just ogle the pictures if you are too far away!). This post is about the process of moving it, for anyone that’s interested in how to move a 3,405 lb piece of antique equipment and for my own reference so I remember how to move it next time (which hopefully is a long time away from now, which means I will have forgotten many important details).
First came the business of brokering the deal, which is a story for another day. Summary: it was a lot of work and it worked out phenomenally. The actual move was broken down into three stages.
Stage 1: Ancillary Equipment, Logistics Meeting
As with many printing press exchanges, this one included a number of other pieces of equipment and the deal was – take the press, take it all. Accompanying equipment included two type cabinets with a smattering of beautiful hardly used type cast by Harold Berliner (previous owner of this press and equipment), a granite composing stone sized to sit atop the cabinets, an empty rusty galley rack, a steel slant top, and sundry items. All which fit into a ten foot uhaul – no big deal! The star of the show of course was the Colt’s – we turned it on, watched it run, I took copious photos and notes, measured it every which way, and five of us (two on the seller’s side and 3 on the buyer’s side) hemmed and hawed and generally checked each other out re: capability/know-how/craftsman trustworthiness.

Making space for the Colt’s at Expedition.
After a lot of stories and a few wisecracks it was clear who our foreman would be for the move, and that everyone felt exceedingly relieved to have the logistics in the good hands of my engineer buddy Dave, with myself as his assistant. We loaded the truck with the accompanying equipment in less than an hour and headed off back across the water. Back at Expedition the offload went smoothly, as I’d already hemmed and hawed about the new shop layout and prepared the space for the new equipment. The question of how to orient the press still loomed but I knew there were only two options. I had a hunch about which one but I knew I’d have to see the press physically in the space to know for sure.
Then a month passed, during which I arranged schedules and reserved equipment on both sides of the water and sealed the deal and continued arranging and rearranging my shop (which is a tiring heavy pursuit, as everything in my shop is very heavy), all in the off hours while I published a new poetry book and released it in Seattle.
Then came moving week, which serendipitously coincided with the two year anniversary of being in our Kingston shop space. The Press move was split into two parts – prep on Weds, move on Friday. The buffer day in between gave us 24hr notice should we need to make any changes to the equipment reservations for Friday.
Stage 2: Prepping the Press

The owner had cleared out everything around the press so we had free working area all around. Our tools consisted of: 20 or so blocks of wood of various sizes (4x4s, 2x4s, a couple of six foot long 2x6s), a seven foot Johnson bar rated to 10,000 lbs, 4 industrial machine skates rated to 3,000 lbs each, a hydraulic jack, rope, rags, wd-40, and Dave’s mechanic’s tool box, and several candy bars.

Task #1 was to dismantle the electrical setup and remove the motor – I first documented the exact set up, and we labeled everything as we took it apart. While Dave was busy with the electrical I set about wiping the press down with wd-40, and removing the oil cups, chase, and form rollers. The weather report looked good for moving day, but we wanted the press well-oiled to protect it from any possible wetness (this is the Pacific Northwest).

Next major task was to remove the outer shaft support, belt wheel, and flywheel. The flywheel on this baby is so heavy it’s got a secondary outside support for the shaft, and that’s a lot of weight hanging out off the main body of the press when you think about it up in the air. We didn’t want to risk torquing the shaft, and also felt it would be much safer to have the load directly centered over the main casting for the fork lift operation. Everything was marked with yellow tape and sharpie before removing it from the press, with particular attention to orientation (i.e. this side towards press, arrow). It came apart easily and we set the flywheel etc out of the way, on blocks. Heavy, but the two of us were able to lift it short distances slowly and safely.

All staged and ready to go!
Now: get the press off the ground. We need about an inch of clearance on one side to get the Johnson bar under, which then got us up another inch and a half, just enough clearance to slip the machine skates under the four corners. Photos tell the story best of this process, moving the press incrementally up off the ground and blocking it religiously every step of the way, on all sides. Communication was paramount between the foreman and assistant, and I was glad we didn’t have a crowd.
Once on skates, we simply rolled the press forward to the front of the garage (SLOWLY – the ground was pretty level but jeez was it scary to feel that great mass suddenly free and rolling). Then we braked it with blocks and 2x6s front and back, said goodbye and headed back to my shop, where we measured and hemmed and hawed some more in the corner that was cleared out for the Colt’s. Having just spent the day with it, I had a better feel for it’s bulk but still, I was torn between the two choices for orientation.
Stage 3: The Actual Move

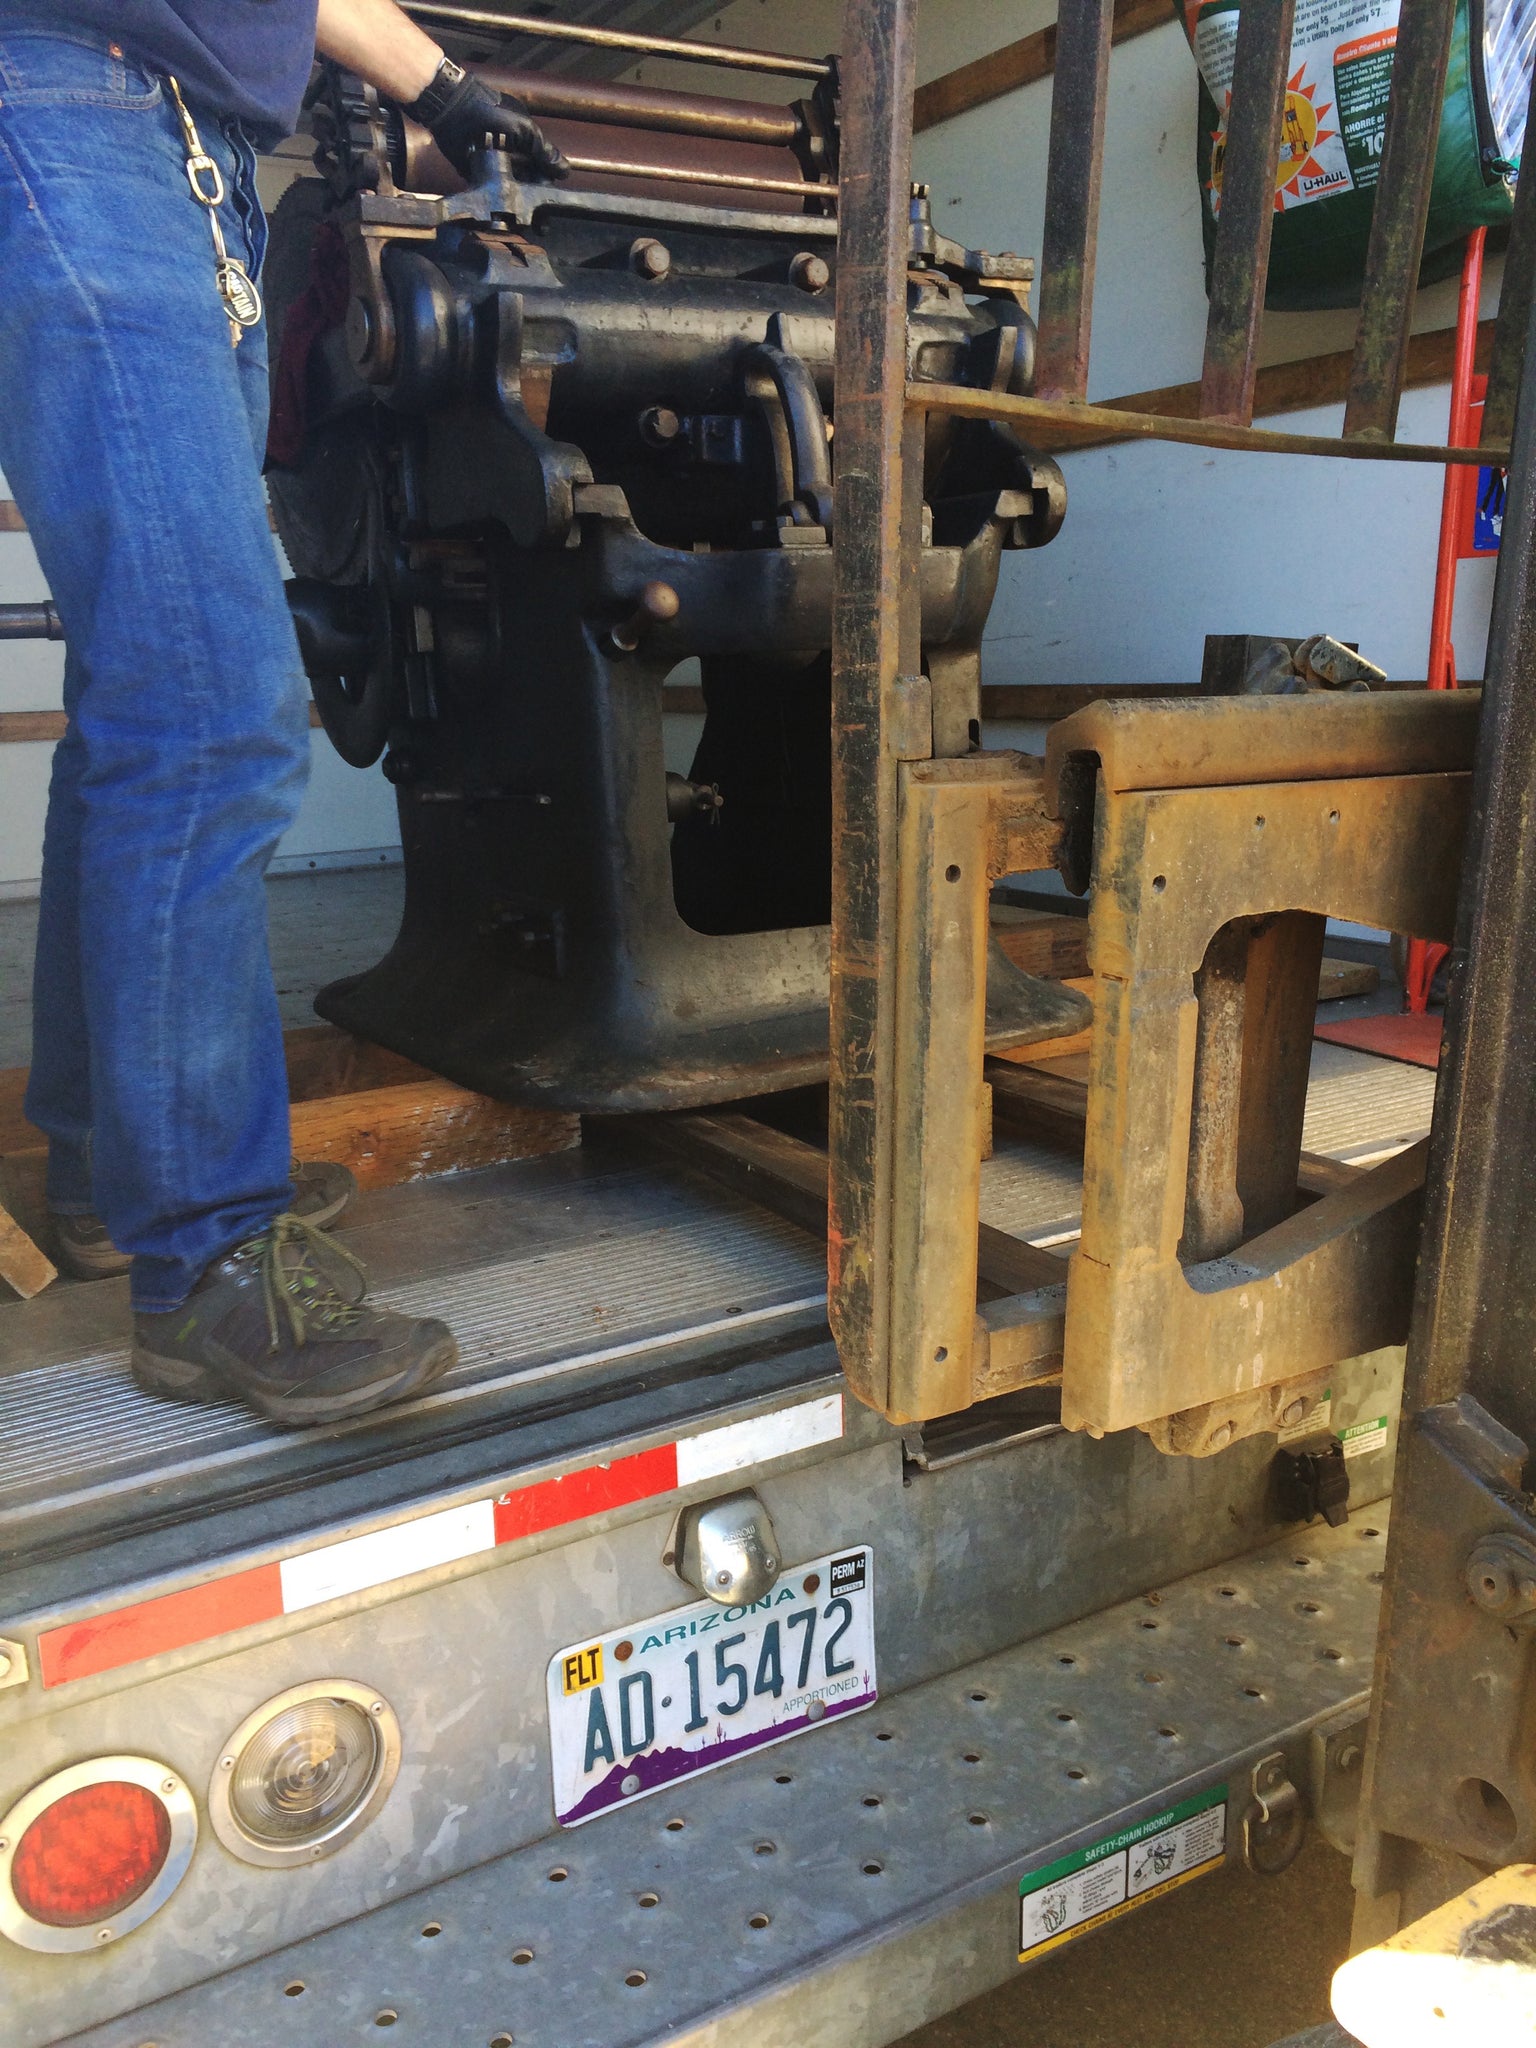
Picked up a 15ft Uhaul – which seemed so small for such a huge press, yet the truck is rated for 6,000 lb capacity, almost double the weight of the press, and we had forklifts on either end of the move, so no lift gate needed. We headed over once more to the Colts’ old home, where there was an All Reach forklift waiting for us in the driveway. Got the truck parked and traffic cones out and basically, squeezed the forklift down the driveway, picked up the Colt’s with blocks between the body of the press and the forklift’s fence, and picked it up. Tipped the forks, secured it with one rope, reversed up the driveway and set it in the truck. Then we blocked it in with everything we had and tied it off and loaded the flywheel, and off we went back to the ferry, me driving slow and steady and remembering to breathe.
Got to the ferry lot and got a call from my friends at Full Circle Press in Nevada City, the previous home of this Colt’s – they sang me ‘happy new press day’ to the tune of happy birthday and cheered and rang bells and we laughed and cried while I waited for the ferry to pull in. Boarded the boat, and this exquisite 110 year old machine took a ride across the Puget Sound.

Back at my shop, my friend Pete from the hardware store across the street met us with his forklift, which doesn’t have quite the same reach as the All Reach… we had accounted for this as best we could, but still had to walk the Colt’s about 18 inches forward to get the forks to clear, using 6 foot long 2x6s as levers and grunting a lot. Half inch by half inch, we coaxed it onto the forks and then I forgot to breathe again while Pete picked it up and deftly turned, set it down on blocks, picked it up from the other side and set it back down into my shop, on the machine skates, facing the way I’d nervously decided was ‘the right way’. Dave and I then rolled the press a few feet into place, and lifted it off the skates and onto 2×6 blocks using the johnson bar. We leveled the blocks and stepped back and I breathed again.
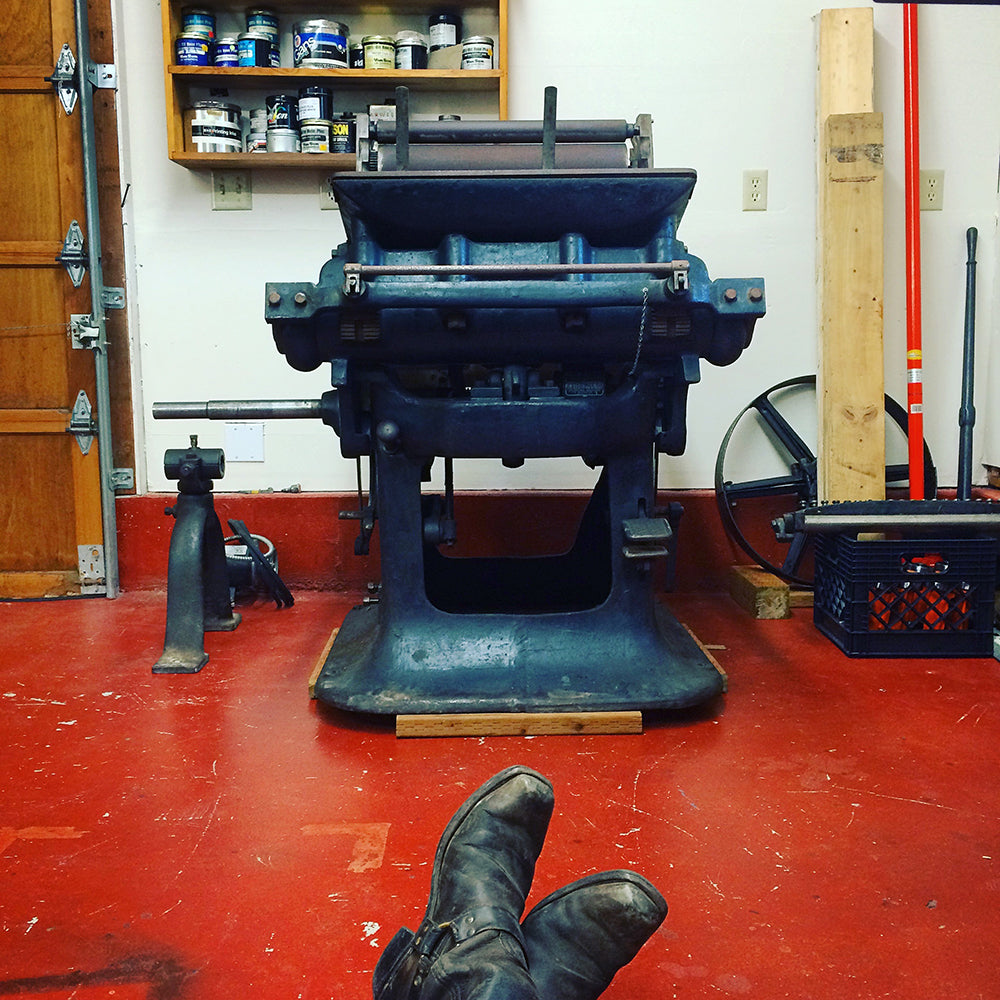
There it is. The Colt’s. New life partner.

We left the flywheel off, now I’m cleaning it inch by inch, removing rust and grit and grease who knows what else. Then we’ll put the flywheel back on, set up the motor, build a better base/skids for it, refurb a few parts and get to printing!